Let’s talk microneedling
I recently started a little skin journey — something I’ve decided to focus on in my 30s as part of looking after myself long-term. I’m not chasing perfection, but I am investing in things that help me feel confident in my skin.
So, microneedling made it onto the list.
I’ve booked in for a course of three treatments (they recommend doing them in a series), and while I’ve only had one so far, I wanted to share what it’s really like — because I feel as though people either overhype the glow or skip over the part where your face is shedding like a snake.
What is microneedling?
Microneedling uses a tool with super tiny needles that create micro-injuries in the skin, encouraging your body to produce more collagen and elastin. It’s said to improve texture, tone, scarring, and fine lines. Basically, it tells your skin to wake up and rebuild.
Sounds good, right?
It’s also… expensive.
Let’s not gloss over that. These treatments can be a big investment (often around $250+ per session), so I definitely didn’t go into it lightly. But I decided to commit and treat it as part of my self-care in this chapter of life.
The treatment itself
Painful. That’s the truth.
I didn’t have numbing cream, so I felt every bit of it. But the good news? It’s fast. You’re only in the chair for about 10–15 minutes. It’s intense, but brief.
The recovery – day by day
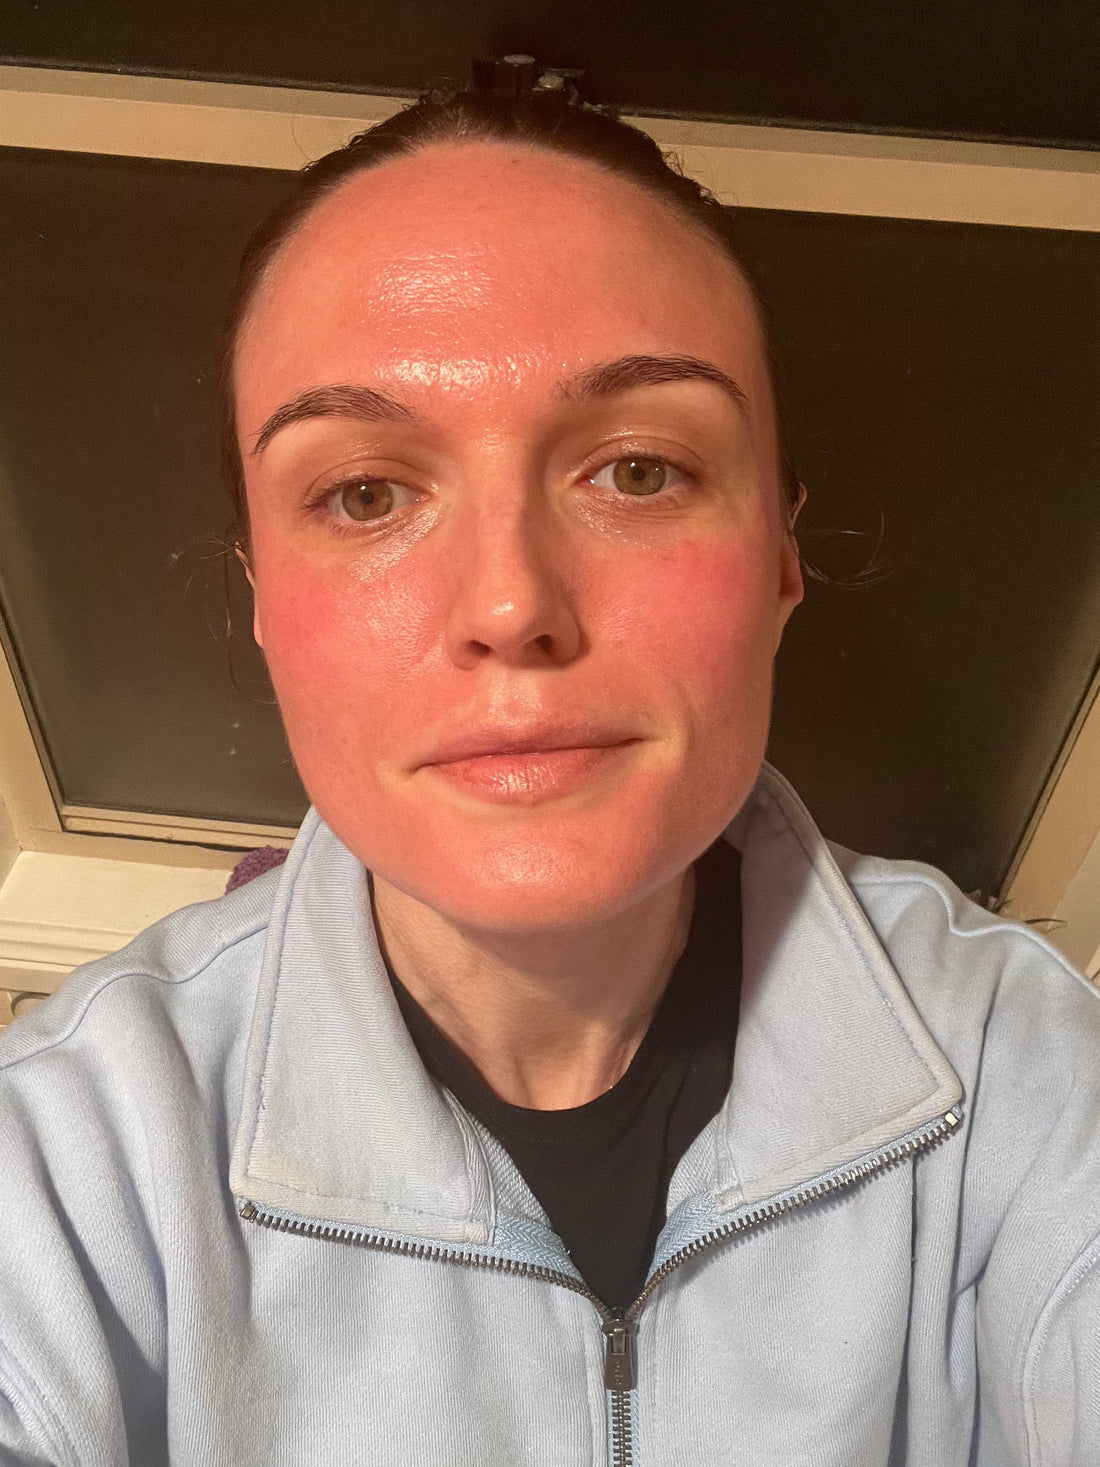
Day 1
Straight after, it felt like a sunburn. Hot, sore, and a bit stingy.
Redness kicked in more during the evening and my skin just felt raw.
Day 2
Not as red, but my upper lip felt sore — almost like a slight blister.
Dry skin started appearing and a few small pimples popped up (apparently normal!). I gently reintroduced skincare, avoiding anything harsh.
Day 3
Dry. So dry.
Flaky skin on my forehead and cheeks, plus rough texture around my lip.
I woke up itchy, and even basic moisturiser burned a little in spots. I tried gentle exfoliation (morning and night), but some areas were still super sensitive.
Day 4
Still dry and tight, especially around my mouth and cheeks.
The skin under my eyes started to look dry too, so I skipped exfoliating and just focused on hydration. Skincare was a bit more tolerable by night.
Day 5
The dry patches had spread slightly to my jawline and upper cheeks.
Redness was still visible around my upper lip. But things were starting to settle. My skin felt less reactive and I could tell it was slowly improving.
By Day 7
Back to regular programming! The dry skin had magically disappeared overnight.
My skin felt noticeably softer, smoother, and brighter.
Would I recommend it?
The jury’s still out on this.
I’m only one treatment in, and while the post-treatment glow eventually showed up (hello, soft and bright skin on Day 7), the journey getting there wasn’t exactly easy.
It was painful, the downtime was real, and the dryness was no joke. I know microneedling is meant to be a long game — with results building over multiple sessions — so I’m keeping an open mind.
I’ll be going ahead with the second and third treatments, and I’m genuinely curious to see if the results build over time. I’ll keep you posted with how my skin evolves.
Final thoughts
At the freedom of peach, we’re all about confidence, comfort, and embracing what makes you you — whether that’s rocking your favourite linen shirt or showing up fresh-faced after a few flaky, red-skin days. Because looking after yourself doesn’t always look perfect — and that’s kind of the point.
I’m not here to tell you microneedling is a must — it’s not for everyone. But I am here to share my honest experience as I keep learning what works for me.
If you’ve been curious about this treatment, I hope this gave you a clearer (and more realistic) picture. I’ll be back with an update after round two — stay tuned.
With love,
Natalie Jane x